- If you have a simple, vintage-style pressure cooker that has a vent pipe, cleaning it is quite simple and quick too. You can run a pipe through it, and it’s done.
- But what if you have one of those hi-tech modern electric pressure cooker models? Use a small piece of wire or a small brush that can easily make its way through the opening and clean it.
Being a fortunate cook who owns a modern second generation pressure cooker, you have to take care of all the parts, and the valve assembly is an integral part of it. For thorough cleaning, you need to remove the entire valve assembly mechanism and disassemble it.
This post will guide you through all the phases involved in the disassembling and cleaning of the spring valve assembly. This demonstration is based on Fagor’s uCook model, but it will work on your model too, given that it belongs to the modern family of pressure cookers.
How Often You Should Clean the Spring Valve Assembly of Your Pressure Cooker
Source: MissVickie.com
It depends on how often you use your utensil. If you use it more often, you have to clean the assembly more frequently. The reason is, the more you cook food the greater the chances of food sticking to the assembly.
If you’re conducting a routine check or cleaning, disassembling the entire assembly is not required. You just have to hand wash the nut normally, just like the way you wash the gasket and lid after using your pressure cooker.
When You Should Disassemble and Clean the Assembly
However, in the following situations, you have to disassemble the whole spring valve assembly:
- If you cooked food that foams
- If you cooked something that froths
- If the food expands after cooking
- If the cooked food splashed up on the lid
- If you’re cooking a food with a high amount of fat or grease
These foods have a tendency to produce more residue in assembly than normal recipes. If the food is burnt or scorched, you have to deep clean your pressure cooker, which also includes a thorough cleaning of the spring valve assembly.
The Process
#1. Disassembling
- Disassembling the Valve Assembly
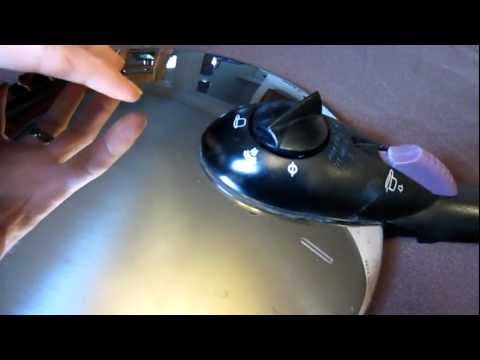
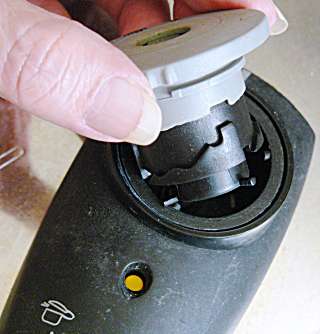
Valve mechanisms can be disassembled easily because modern pressure cookers offer a knob to remove the assembly. First, you have to remove the mechanism out of the pressure cooker. To do that, you have to adjust the selector knob to the icon indicating “unlock valve.” Slowly push the valve down and turn the knob so that the valve can be separated easily from the housing.
- Disassembling the springs
In this type of model, the spring valve has two springs located inside.
- The upper part of the valve is normally grey in color where one spring is located
- The lower part of the valve is black and has the second spring.
You are going to need a small brush to clean it. Insert the brush through the opening available at the top of the valve, and clean the valve.
- Disassembling the Brass Valve Nut at The Back of the Lid
Now, turn the lid upside down. The yellow colored pressure indicator has its lower part stuck with the back of the lid. There will be a valve nut just below it, which has a dual purpose:
- The nut attaches the lid and the valve assembly
- It serves as an opening point for steam as it enters and escapes through the valve
This brass valve nut gets tarnished and blackened because too many things accumulate on it, such as greasy food particles and minerals, and other impurities in water. Use a flat head screwdriver to remove the nut.
#2. Cleaning
After disassembling everything, you will have three things: the spring valve assembly, the valve nut, and the housing. Now, follow these cleaning steps:
- Start with the lid
- Wash it by hand, using hot water.
- Use a dishwashing soap that’s also a good degreaser. For example, you can use “Dawn.”
- The valve seat in the lid must be scrubbed carefully from the inside because there will be a lot more sticky food buildup than what you would expect.
- Other parts
- Wash all the parts carefully with water, while deep cleaning all the small areas.
- Use a soft brush (a small size toothbrush can help) to clean all the valve parts. It can reach all the small areas easily.
- Drying
- Before reassembling, allow all the parts to dry for a while.
- Water should not be trapped anywhere inside the lid handle or within the valve.
#3. Reassembling
Now you can see the look of the valve nut. If it looks like brass, you’ve cleaned it well.
Carefully reassemble all the parts to their respective places. While reassembling, make sure not to apply extra force. For example, you might wonder if you have to apply extra force to fix the valve nut. Extra force or too much tightening can easily damage plastic parts. So, be careful!
Finally
Modern-day pressure cookers are quite fast and offer great safety features. However, these safety features may become ineffective after a while, if you ignore the deep cleaning of your pressure cooker. Valve cleaning is essential to keep your pressure cooker working well for a long time.

- With a little effort and time, you can disassemble the valve mechanism and remove the entire assembly from the lid. Cleaning the valve assembly is quite simple, as you just need to wash it with water using a small brush. Don’t forget to clean the lid from the inside where most of the residue accumulates.
- Allow all the components to dry, ensuring that not a single drop of water remains there. Reassemble all the parts, following the instruction manual.
Check your pressure cooker and its parts regularly. Some parts may need a little re-tightening or re-adjustment once in a while.
How do you put the spring back in for the quick release valve. Mine came out when I cleaned it. Now I’m not sure which direction the spring goes.